Showing posts with label NOTD. Show all posts

NOTD | Newspaper Nails

25 comments

Hi lovelies,

As autumn is setting in, everyone in blogosphere is talking about fall nails and shades of the season. I can see there are beautiful burgundys, terracotta, deep blues and purple nail shades out at this time of the year. But what if you wanted something different? Something understated yet giving you a feel of the changing colors in nature and crisper weather, something that stands out from the rest. Here’s my version of fall 2013 nails.

After much consideration I thought I would start my fall 2013 nails with newspaper nail art. I have chosen a nude, pale pinkish tone base that holds a little shimmer. For me this nude tone represents the evaporation of bright summer hues of salmon pinks, radical reds and fuchsia as autumn arrives slowly.  The shade has faded with the fading colors of nature but there is still time for everything to dehydrate and turn to rust. My inspiration is my candle lit room over a chilly weekend inside my comfy bed with a classic book in my hands. If you are a book lover like myself (who loves collecting books but never has the time to read them!?) these will surely be an inspiration for you as well.

Newspaper Nails
Newspaper Nails

Newspaper nails are really easy to achieve – especially when you follow my instructions.

Things you’ll need
Nail polish (the lighter, the better)
Top coat (I used the wet look top coat)
Newspaper strips (I used the part where there was A LOT of text. Hint: business section lol!)
Solution (Alcohol, perfume, mouthwash, water, hand sanitizer)
Scissors

Newspaper Nails


Step 1: Nail Polish Base
Apply your base nail polish. I applied 2-3 coats to get a good solid color.
Let it COMPLETELY dry. I gave it a good 30 mins.

Step 2: Newspaper Strips
Cut 10 newspaper strips in the size 2” x 2“. Try different fonts and text sizes. I used smaller font for this tutorial. You can even try foreign language newspaper for a more diverse pattern.

Step 3: Newspaper Imprinting
Dip you finger in the solution for 5-10 seconds.
Place the newspaper strip on your nail and press gently. Do not press too hard or you’ll end up with bits of paper on your nails. Don’t worry about the text on the newspaper it will always appear in reverse. Also, if you do this step while your nail polish is still tacky it is going to come off with the newspaper. I waited 30 seconds before I gently removed the newspaper.
Repeat this process for each nail.
Let everything dry. I gave myself good 5-10 mins.

Step 4: Top Coat – seal the deal!
Apply top coat. This will ensure that the ink pattern is sealed on the nails and would also intensify the letters. Again if you’re hasty in applying the top coat you’ll end up with a runny pattern.
Let everything dry & voila!

Newspaper Nails

There are loads of shades you can use as your base color. Even the French manicure base coat works great. I used a pinkish base coat that has the tiniest bit of simmer (not glitter). A lighter shade will make your text appear brighter. However you can always try a darker shade. Avoid glitter nail polish for obvious reasons – text would not emboss on your nail as much as on a smoother surface. Creamy, non-shimmery nail polish texture gives you the best results.  

Enjoy the typographic effect on your nails!

Follow on Bloglovin
Follow on Bloglovin

View Post

NOTD | Maybelline Apple Candy & ArtDeco Ombre

21 comments


Hi lovelies!

It has been a while I did a NOTD post. As I was sitting thinking what nail polishes or nail art I should come up with for this post I also thought how about if I should re-use my old nail polishes rather than new ones. After all we don’t throw away a nail polish after using it just once. I also wanted to challenge myself to see what I can create from what I already have. Hypothesis of my Project Duex is that it's going to be awesome!

So today I used two of my most favorite nail polishes, reviews of which I have already posted in the past. The first one is Maybelline ColoRama in Apple Candy and the second is ArtDeco's 11.292 which is a beautiful gold glitter nail polish. Here is how I created this. I started with clean nails and applied 3 coats of Apple Candy. I wanted the color to be really rich and deep. Once completely dry I took a small piece of sponge and dabbed very gently my next nail polish which is ArtDeco's 11.292 gold shimmer. This time I worked from the tip of the nail and backwards. With very gentle patting I tried to create a gradient. I repeated this multiple times until I was convinced that I had achieved the look I wanted to create. Voila!

NOTD: Gradient with Maybelline Apple Candy and ArtDeco's 11.292

NOTD: Gradient with Maybelline Apple Candy and ArtDeco's 11.292


If you plan to create a similar look for your nails here are my tips.
 
Once you apply your base nail polish give it plenty of time to settle down and dry completely. I went ahead to harvest my crops, collect pies, cheese, butter, sugar, wool and attend my sheep and cows at Hay-Day, my latest addiction! Ha-ha! If you do not, patting on another nail polish when the base is still tacky will create a mess and look untidy.

When applying your top nail polish to the sponge put as little as you can and work with that. If you feel all of it has been used put a little more. That would help you achieve a neat look.

Draw a horizontal imaginary line on your nail and try not to go too far ahead of this line. You want both shades to look balanced.

NOTD: Gradient with Maybelline Apple Candy and ArtDeco's 11.292

NOTD: Gradient with Maybelline Apple Candy and ArtDeco's 11.292


I think this looks stunning! And I saw so many people notice what I had done on my nails. I'm really proud and already thinking what else can I achieve with these two nail polishes - Project Duex.

Would you give it a try?

Follow on Bloglovin
Follow on Bloglovin

View Post

NOTD | Maybelline ColoRama Apple Candy and Wine Shimmer

20 comments

Spring is here..

At least in my part of the world. Weather is warm & pleasant. Trees are turning green, flowers are blooming in pretty colors. Birds are happier - robins & bluebirds. The air is filled with fragrance of fresh flower buds.

With all this drama taking place around me who cares for soft pastels?! I kicked off Spring with Maybelline Colo Rama's Candy Apple  Wine Shimmer.

Maybelline ColoRama's Candy Apple & Wine Shimmer

Candy Apple  is the perfect red! It's a candy-apple like deep red. You don't need 2 coats, one coat is enough & the brush makes application even easier. The finish is glossy, elegant & ravishing. Wine Shimmer is a lovely raspberry red jelly that includes tiny specks of holographic glitter which are a little spaced out. Perfect for a hint of shimmer. I applied 2 coats of Candy Apple  & topped it off with a single coat of Wine Shimmer. 

Maybelline ColoRama's Candy Apple & Wine Shimmer


Both these gorgeous shades are part of Maybelline Colo Rama line & look absolutely beautiful & lively. If you want extra gloss finish off your nails with a single coat of Maybelline Colo Rama Clear Shine top coat like I did. 

Maybelline ColoRama's Candy Apple & Wine Shimmer


What do you think? What's your favorite shade this season?
Welcome Spring !


View Post

NOTD | Artdeco 11.292

10 comments

Introducing ARTDECO

Hi again pretty ladies

Today's post is yet another Nail Of The Day. It was beautifully sunny outside in the afternoon today, in this freezing cold weather. As we all know Christmas season is in full swing. With all that in mind & the sunny afternoon I decided to pick my Christmas  nail color. I choose ARTDECO's 11.292

ARTDECO is a premium retail German brand. It's comparatively really pricey than most of your drugstore brands. I have been trying out some of it's products from time to time especially whenever I have a fat wallet. This brand has all the essentials & exclusivity of an international brand. The reason why I like it is because it gives you the finish & satisfaction of a high end international cosmetic brand. ARTDECO stands for trends & will always come up with the latest & must-haves

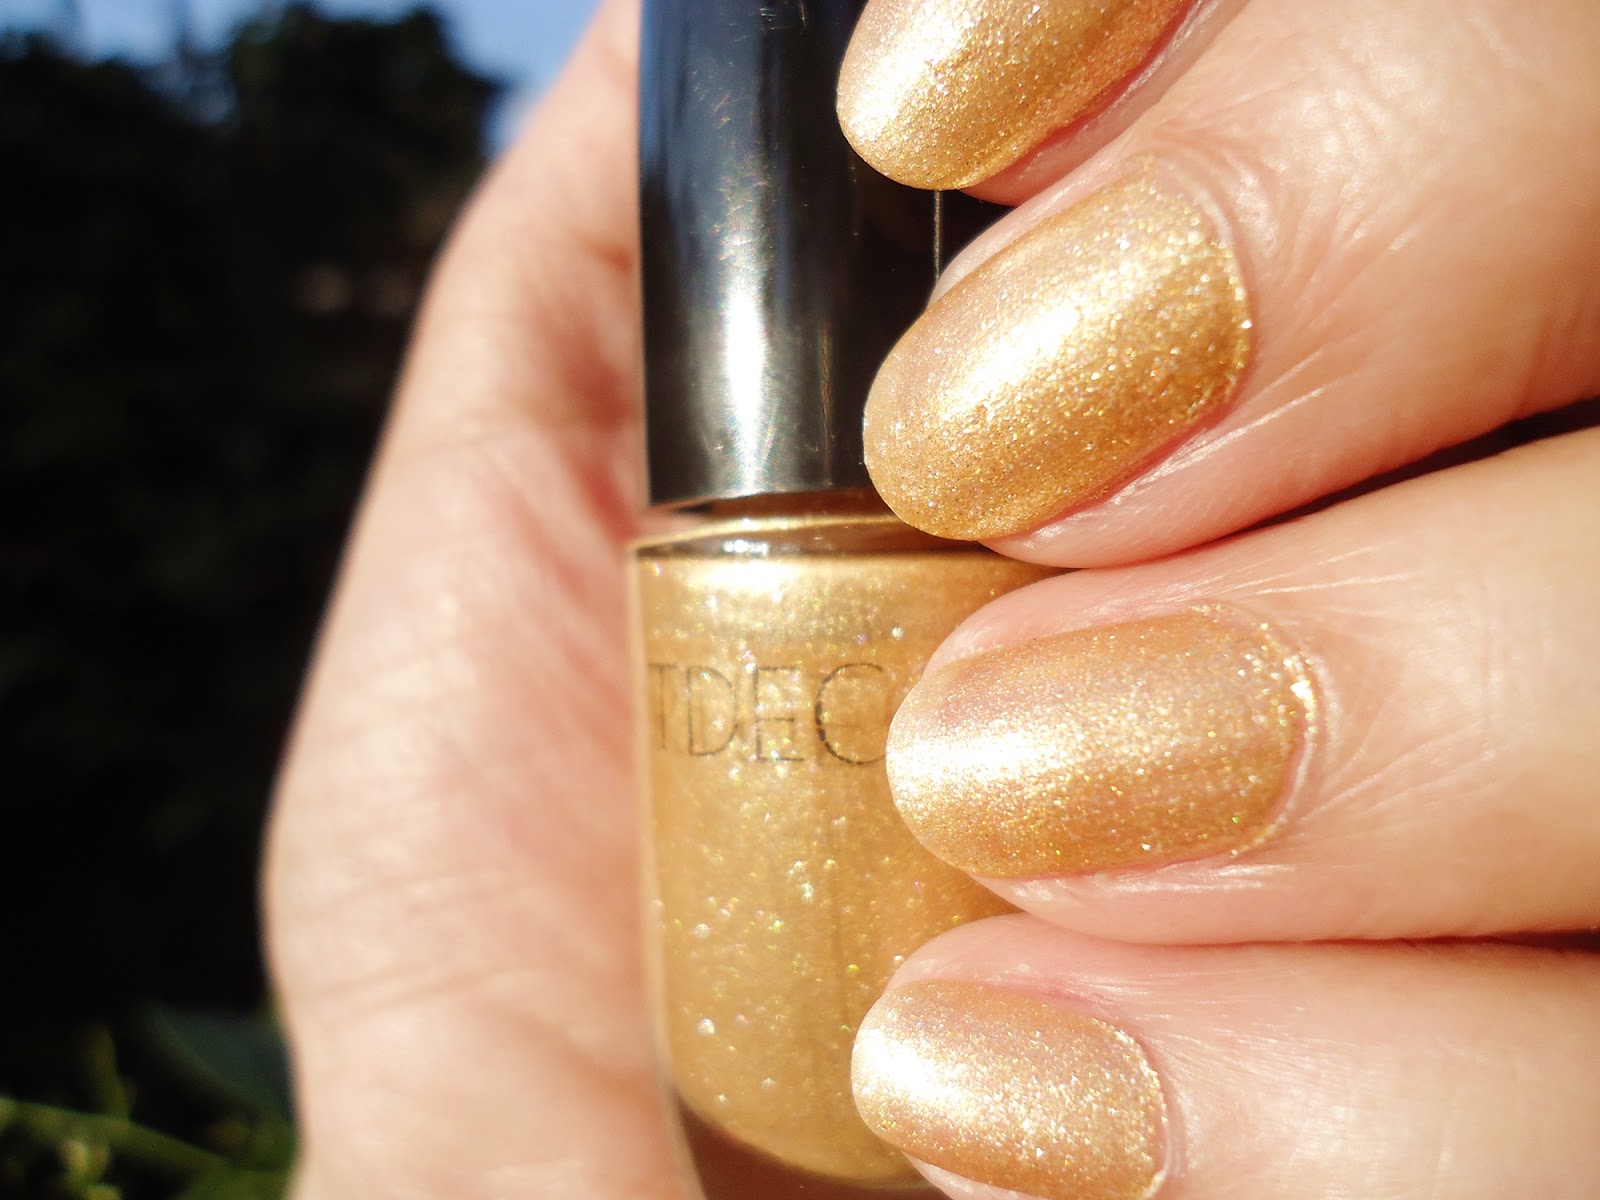
ARTDECO Nail Color 11.292

The ARTDECO shade I chose for Christmas is shade 11.292, a very nice gold, glitter nail polish. It's a bright gold shade & is loaded with shimmer & micro glitter. It's highly pigmented & gives off a really fine glitter effect when light hits it. The consistency is neither not too thick nor too thin. It's almost opaque in one coat. It looks best in two coats. 

Another thing I like about this nail color is that it's brush is made of high quality nylon which ensures a smooth & fast application. I also noticed that it dries quick which is another plus point especially if you're in a hurry. The polish is pretty durable & doesn't chip easily. Since I refresh my nail polish, whichever I'm wearing, everyday (yea!) I can't exactly tell how long it lasts. But I'm sure it stays for at least a week. 

ARTDECO Nail Color 11.292

ARTDECO Nail Color 11.292

ARTDECO Nail Color 11.292

One more reason why I like this shade is that it is almost close to Chanel Gold Fingers. Another reason for you to try it out. Check out more about ARTDECO's full range of cosmetics by clicking here. 

Very recently beauty icon & immensely gorgeous Dita Von Tease joined ARTDECO to release a classic, timeless makeup collection. Her signature makeup is seduction, elegance & a touch of mystery. Check out ARTDECO's Dita Von Tease complete collection by clicking here.
"Glamour is about creation, & any woman who desires it can learn to create it as I have...." - Dita Von Tease
Which one is your favorite nail color for the season? 
What makes you fee Christmasy?


View Post

NOTD | OPI Black Cherry Chutney

8 comments

Hi lovelies!

I so wanted to do my first Nail of the Day post. J Beauty blogger's world is going crazy over   fall  nail colors. Everywhere on blogosphere all I see is new  fall  nail shades. This was a big temptation for a nail polish addict like myself. Though I'm more inclined towards softer tones of nail polishes, not that I do not fancy darker shades, the color I picked for this post is pretty gothic. 


O.P.I Black Cherry Chutney

This is O.P.I  Black Cherry Chutney. I found it on the O.P.I counter while shopping with my best friend & was lost in the color nirvana for a while. However, as soon as I snapped back to my senses I decided to go for this shade. O.P.I  Black Cherry Chutney is part of the O.P.I India Collection if I'm not wrong. 


O.P.I Black Cherry Chutney
With Flash!
O.P.I Black Cherry Chutney

This collection has colors that are warm, enchanting & vivid O.P.I Black Cherry  Chutney is a delicious dark, vampy, purple-red-black shade, almost like black berry. It contains subtle shimmer for further depth & is very deep metallic. I applied two coats for the photoshoot. It's almost magical! The shade looks different in different tones of light. I stepped out in my garden to show you how the shade looked in natural light. Since it was a bit breezy I managed to capture a couple of interesting clicks. 


I really enjoyed doing this post & I hope you pretty ladies like it too. For more on the latest from O.P.I click here. Let me know what you think of this shade. 

Have you tried out this shade? Have you recently done a NOTD post? Yes? Leave a link below so that I could check it out! 

Cheers! 


View Post
Previous PostOlder Posts Home
BLOGGER TEMPLATE BY pipdig